A CTI Analyst Homelab
Intro
As career plans, personal interests and the overall curiosity of exploring new technologies change, so does a homelab. It has been a few years since my last homelab writeup and at the time, the focus was geared towards malware analysis without much else. Career goals have shifted to more of a defensive side towards threat hunting and detection engineering so I wanted to build something to support those two fields. This would require a lot more resources and not something I want to continue to maintain on VirtualBox.
Type 2 hypervisors certainly have their place. I’ve only ever used VirtualBox and VMWare Fusion as it did what I needed it to but as more machines were being added, it became a hassle to manage, move them to new machines or clone one from VirtualBox to work on VMWare. Not difficult but not ideal. So I decided to buy a NUC which is a small form-factor computer with a board the size of two Raspberry Pi’s (more like 1.5) that can run a baremetal hypervisor with very minimal power draw. I configured mine with a 12-core 13th gen i7, 32gb of RAM, 1TB M.2 SSD and Proxmox as my hypervisor of choice. Glad I didn’t go with ESXi now (thanks Broadcom).
The Goods
Similar to my last writeup, I’ll explain each system I have and why. This won’t be a walkthrough guide of installing and configuring everything though as all hypervisors are unique in their own way.
Within the Proxmox webui is where you manage the environment. To connect to each VM, I use SPICE to remote into each machine which is OS agnostic making it a single click to connect to.
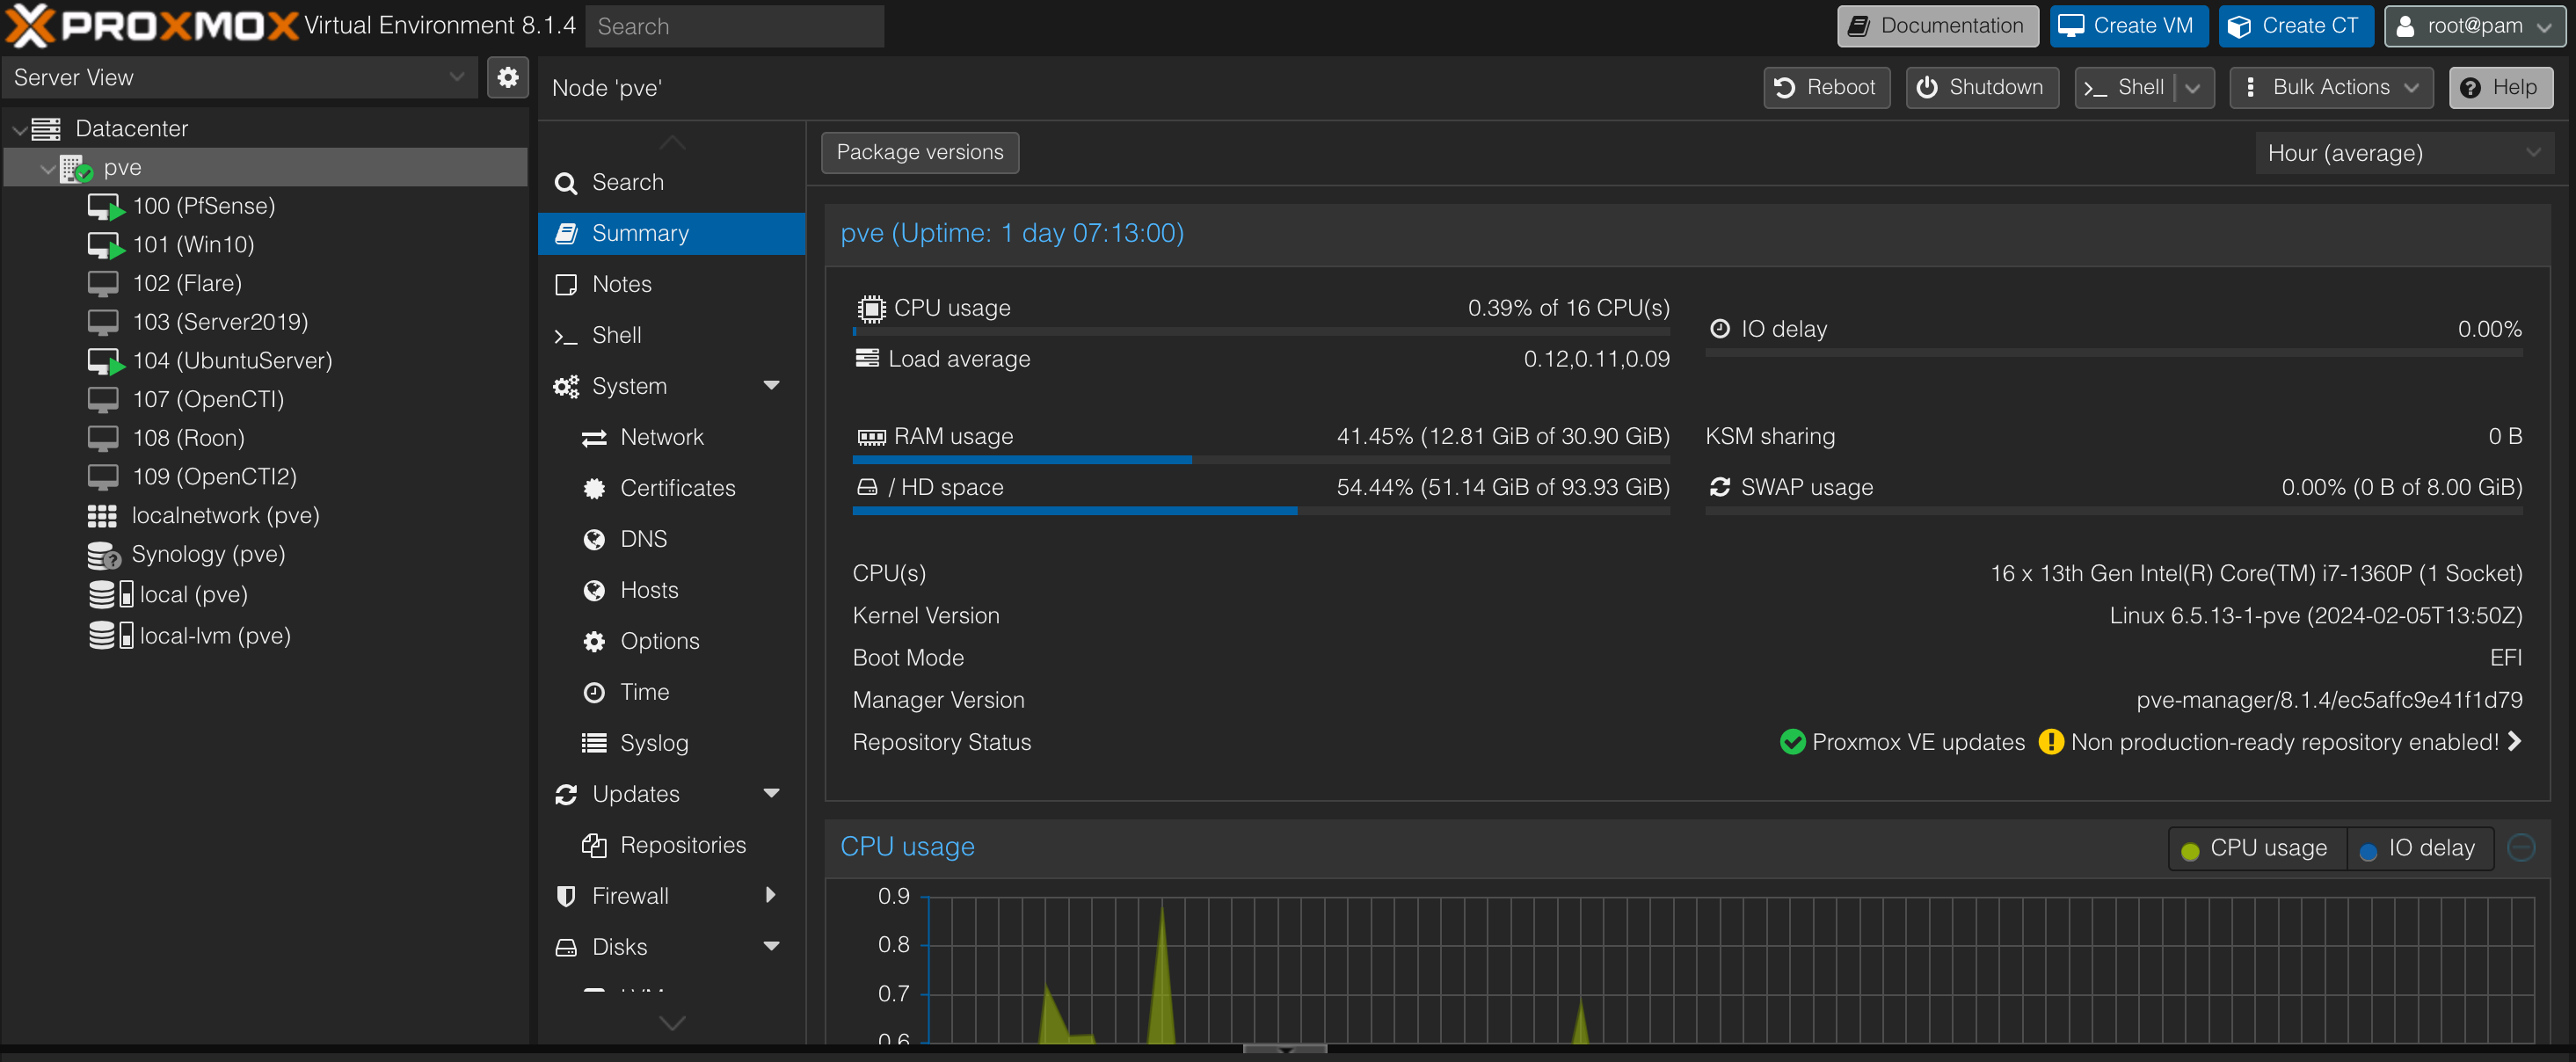
Now onto everything installed.
PfSense
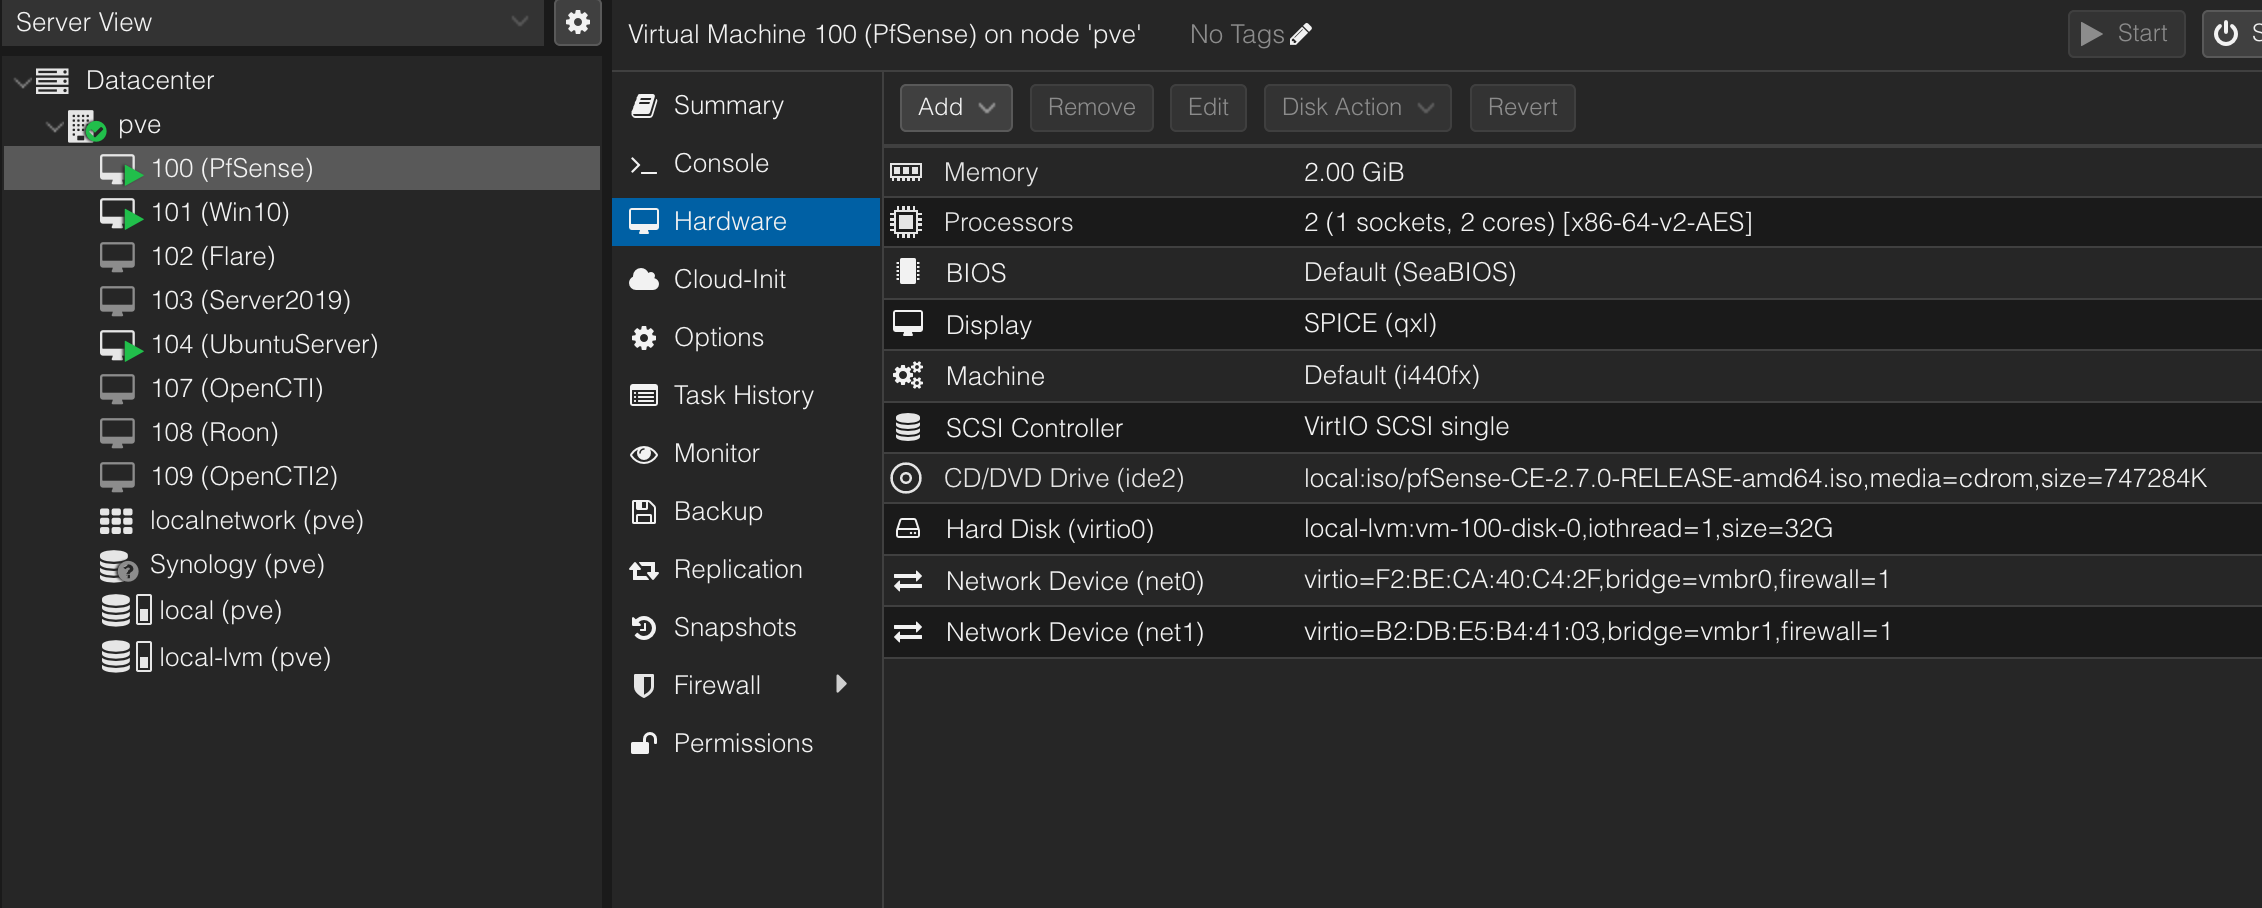
PfSense is an open-source router and firewall that offers more features than I know what to do with. I used to run it on VirtualBox but knew it’d be a lot more efficient on dedicated hardware someday. The intended configuration was going to be way more complex with multiple LAN interfaces to segment management machines, a sandbox, SOC environment, attacker machines, etc. You know, a true network. That all became too much at once and I didn’t really have a set goal at the time so then I thought:

I ended up creating one WAN and one LAN interface and called it there. If it ever got to the point where segmenting would be beneficial, I could add it.
Narrator’s voice: “He didn’t”
The sole reason I needed a router/firewall was to separate my VMs to their own network so that nothing on my main network could communicate with the lab. Realistically, I wasn’t going to be setting up anything that actually required all that segmentation.
For clarity:
- Home network is all on 192.168.141.1/24
- Lab is on 10.10.10.1/24
- bridge=vmbr0 is for the WAN interface
- bridge=vmbr1 is for the LAN interface
Windows 10
We all need a machine to blow stuff up, right? Hello Windows 10 box! This machine only has enough tools to clone GitHub repos, remote to other machines, extract archive files, and any dependencies required to run certain malware or play with PoCs. The more important parts installed are Sysmon with the SwiftOnSecurity config and a LimaCharlie EDR agent. I made a snapshot of the machine once all prerequisites were met so that any time I execute malware or break something beyond repair, I can revert back to the base system state.
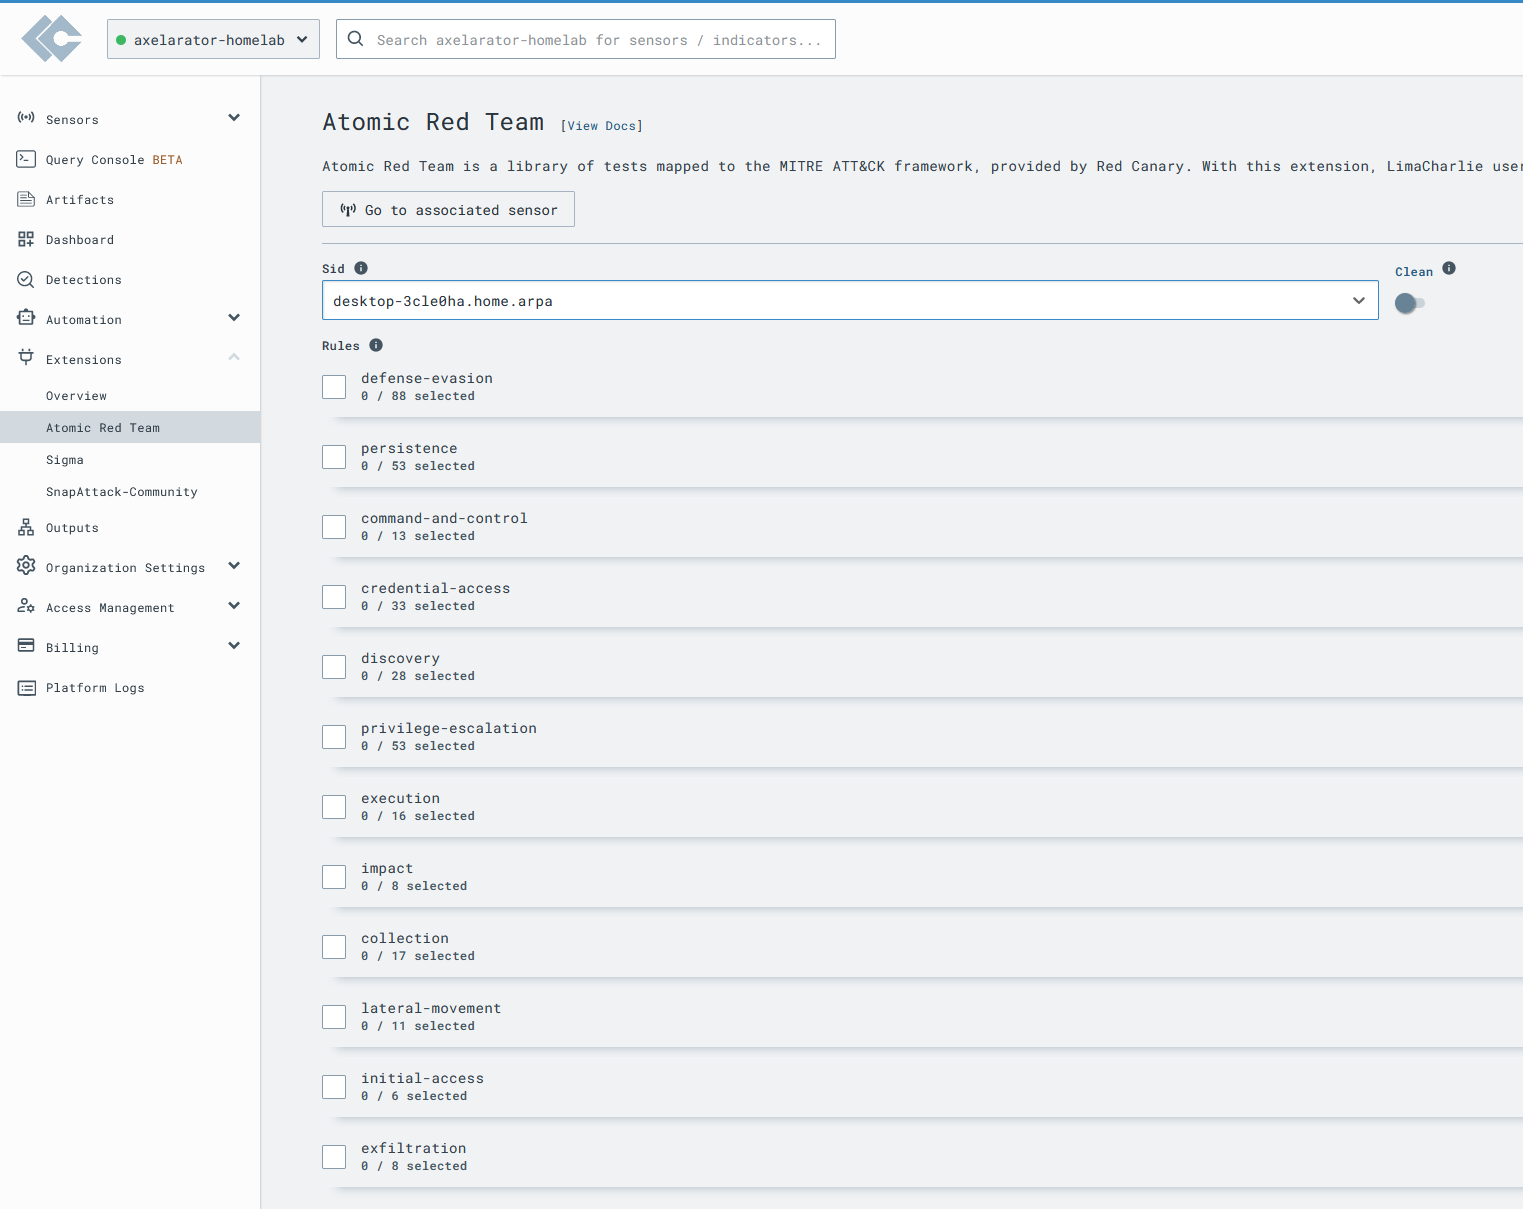
LimaCharlie is a SecOps Cloud Platform that I honestly hadn’t heard of until late 2023. Never really thought twice about it until I found Eric Capuano’s blog series, So you want to be a SOC Analyst? where he goes through setting up an environment to emulate adversary behavior, block the attack with Sigma, tune false positives and write YARA signatures to automatically scan files or processes. Although LimaCharlie isn’t required, it’s much easier to follow a guide covering some areas of interest using the same tools as the author. I haven’t had much experience with the EDR but something that immediately caught my attention was the built-in Atomic Red Team extension. This makes it extremely easy to run Atomic tests and triage detections.
Flare
This is also a Windows 10 box but with FlareVM installed. If you’re unfamiliar, Flare-VM is developed by Mandiant and is a collection of reverse engineering tools similar to how Kali and Remnux are also a suite of tools on top of an OS. FlareVM can’t be packaged as a VM though so it requires you to create a Windows 10 VM, clone the repo and install on top of Windows. I simply duplicated the above Windows 10 VM without Sysmon and the EDR agent and installed Flare on top of that. I occasionally use this machine to analyze certain malware but I honestly haven’t done that in a while. Most of the time I use this as my “host” box that I SSH into other machines or login to web servers running on the LAN. As all of these machines reside in the PfSense LAN that I’ve segregated from my home network, I can’t simply use my main desktop to login to those portals above which is intended. I need a machine within the lab network to do that.
Server2019
No lab is complete without an Active Directory environment. Win10 is joined to the AD domain along with an administrative and local user to allow a wide array of permission testing. Outside of being a functional AD DC, this machine is similar to Win10. Not much is installed on it outside of the base configurations so that any malicious activity I throw at it can be observed, ingested to the EDR and reverted back to a safe state.
Ubuntu Server
As of writing this, this is an “attacker” machine. I went against using Kali because I wanted something more discreet that isn’t loaded with tools since this doesn’t always operate as an offensive tool suite. Contrary to that though, I have Sliver C2 installed and use it to create payloads that I can send to Server2019 or Win10. I chose Sliver because it’s easy to get running and I’m interested in it from a hunting perspective. Being hands on with an open-sourced tool allows you to inspect anything you’re interested in and understand its behaviors. By doing so, you can create all sorts of rules. See my Hunting C2s with Nuclei post which covers aspects of Sliver. Outside of all that, I still needed a Linux machine though to play with tools like SSH-Snake or run specific Linux malware.
OpenCTI / OpenCTI2
As the name suggests, this is my machine that runs OpenCTI. The reason I have two is because I set up Docker swarm and OpenCTI2 acts as a second node to serve as a load balancer and help with services and tasks. A swarm isn’t required but it ensures the first node is not overloaded since it’s already running 12+ containers. OpenCTI is very resource intensive especially when enriching observables and I can’t allocate all my resources to it. I allocated 4-cores and 16gb/8gb of RAM to each respectively. The goal I wanted to achieve with running OpenCTI is to have my own personal threat intel platform (TIP). It’s responsible for ingesting feeds and enriching collected indicators through a sandbox, VirusTotal, Shodan, and converts observables to a STIX format to merge MITRE ATT&CK T-codes, CVEs from KEV, organizations, and locality. Feeds come from anything I’m subscribed to within AlienVault OTX which isn’t a lot to keep enrichment down and not exceed my API quota by 8:00 AM. Uptime is also very important to maintain trend analysis over the coming weeks/months so outside of upgrades, it usually maintains the same uptime as PfSense. A great example use case is being able to consolidate adversary activity towards a specific industry or follow news on a specific malware family. These machines aren’t network independent from the rest of the lab but they also don’t interact with them at all. There is a firewall rule in place to limit connectivity from the machines I execute malware on though.
Since OpenCTI is configured through Docker, I also have Portainer running to easily manage the individual containers and OpenCTI stack. This makes it so much easier to deal with any errors or change container configurations without having to use the CLI all the time. This is the first time I’ve used Portainer and I can’t see going without it for anything else in the future. Plus, if I want to deploy any other containers independent from OpenCTI, I can just create a new stack and run them there.
Roon
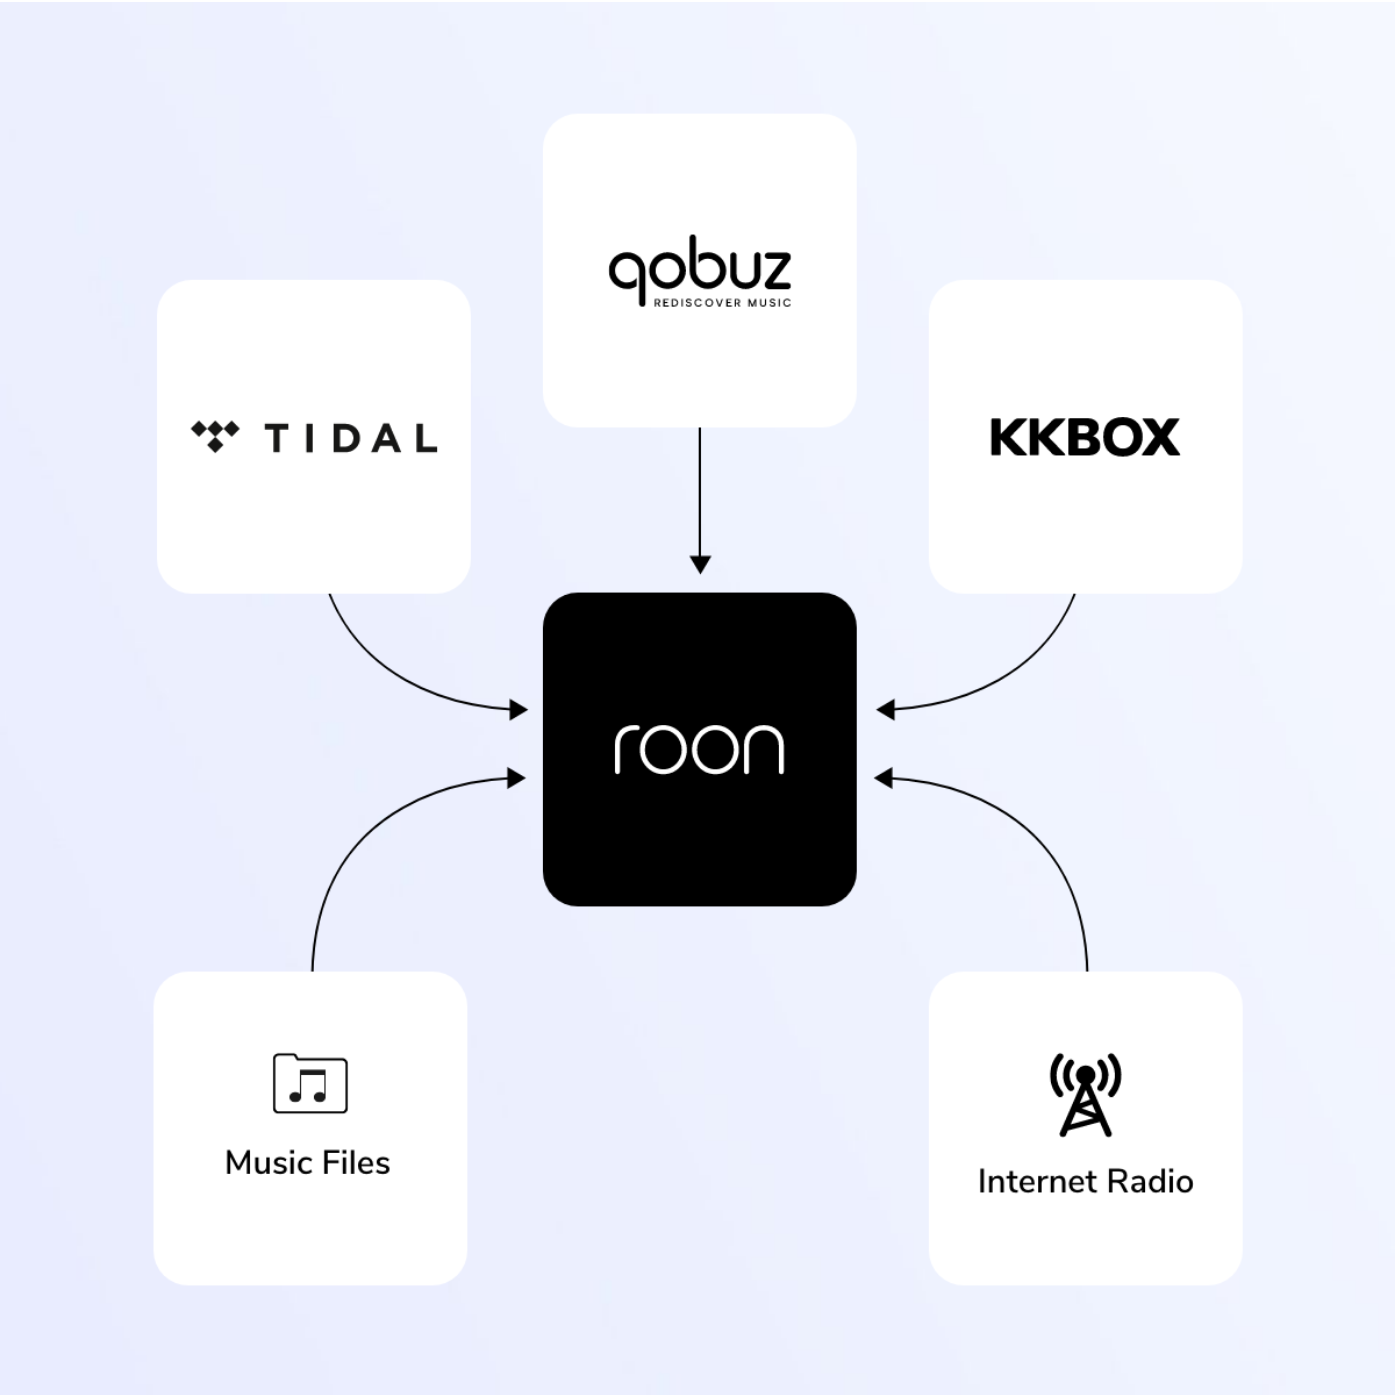
I’m going to switch subjects here. Another hobby of mine is music, an audiophile if you will, and something lacking on most apps is a vast amount of metadata to learn even more about artists. When listening to a song, it’s nice to look through the credits and see everyone involved beyond producer and artist, read a bio about the artist or reasoning behind a song or album and get better curated stations based on your music. Roon is the ultimate metadata addition to a music collection and allows you to control any Roon-enabled device across the house via its app. As it’s a Bring-Your-Own-Music type platform, they only support three streaming platforms; Tidal, Qobuz, and KKBOX along with any locally stored music and internet radio. I use Tidal as my source of music. The other mainstream streaming platforms aren’t supported because they don’t support anywhere near lossless quality. Apple Music is an exception because they use their own ALAC codec which is lossless but their API was just released and will only allow it to be used on Apple hardware. As a large majority of audiophiles (which is still a very small market) don’t use Apple Music anyway, it’s not something I’d expect to see anytime soon. Roon also uses it’s own audio engine, MUSE, which handles up to 768kHz/32-bit PCM and DSD512 (stereo and multi-channel) in WAV, WAV64, AIFF, FLAC, ALAC (Apple Lossless), DFF, DSF, OGG, MP3, and AAC.
The short description is Roon organizes your music library into a beautiful interface with a rich amount of detail about the music and streams at the best available quality to get the most out of your equipment.
My setup now is:
- Desk: Audeze LCD-X with an iFi Neo iDSD
- Living Room: WiiM Pro Plus DAC, Yamaha RX-V485 receiver, pair of Klipsch R-51M speakers and a Dayton 10” subwoofer.
Ok I’ve ranted long enough. So why is Roon running on my server? Well Roon as a platform is self-hosted meaning your library organization and audio transcoding is done locally. Users can either buy a complete ready-to-go product called the Nucleus or download an image and install it on a NUC, NAS server, or on your desktop. Just like OpenCTI though, it can be resource intensive and requires uptime if you want to control it from other devices, so desktop is usually recommended to test it out first. I did a workaround to install it within Proxmox to avoid buying another NUC and since my library isn’t that large and I’m not dealing with multiple devices, resource usage is quite small.
Synology
This is actually a mounted NFS drive from my Synology NAS. That drive also has separate permissions to connect to my main desktop so I can move files across hosts easily. Creating a folder within my NAS separate from my media seemed like a simple solution as I can also mount this drive within VMs too and use it as a sort of shared drive between the NAS and Proxmox.
The local drive is where ISOs and container templates are stored. Proxmox supports LXC containers to be specific. local-lvm is the second partition where your VM disks and CT volumes reside.

Summary
That’s it honestly. Not too complex right? I wanted to provide this update to show just how broad a homelab can get while also being relatively easy to setup. Network configurations are fairly basic besides a few rules and all VMs don’t have a lot installed on them. I’m working with very few tools at the moment to get comfortable with them until I decide to add more.
Although this wasn’t a walkthrough guide, I hope this inspires some of you to either start a lab or reevaluate what you want out of one. In my opinion, having hands on experience is crucial to maintaining a skillset or validating knowledge to a potential employer. For me, this lab serves as an extension of my day job working as a CTI analyst with areas of exploration to learn more about detection and hunting.